Making a Video
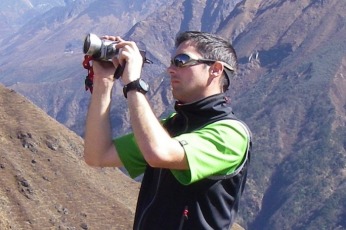
James and the trusty JVC camera
The idea behind creating a video was purely for our own entertainment and if it was good enough, show to family and friends, as well as use as an aid for James and Andy whenever they needed to give talks on the expedition, which they had promised to do for the Alpine Club as well as a number of others. With the primary goal of climbing a new line on Phari Lapcha the video was way down the list of priorities, but in the end has turned out to be well worth the effort.
Is it perfect? Nope, far from it, this film was made over weekends and without really too much know how, so I'm sure you'll be able to find fault with it but we don't really mind, we think it looks OK.
Neither Andy or James had really done anything like this before and with limited equipment and experience the two climbers / directors and camera men turned out some really great shots and insights into the expedition.
The notes below online the process and basic equipment we used to make our short video and hopefully show just how easy it is for you to make your own.
Equipment
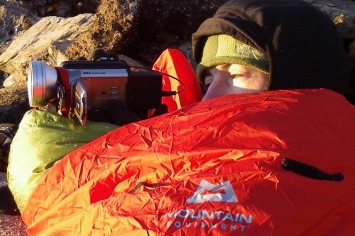
Andy, JVC and wide angle adaptor
Camera Equipment
In order to make a film the one key thing you need is a camera. So the first thing that we needed to decide upon was what to use. With the arrival of tapeless digital cameras and HD cameras as well as super cheap DV cameras it was down to how much we had to spend. True to form we didn't have much. In the end we went with a Standard Definition JVC DV Camera (£130) and 3 DV tapes (£10) as we thought that it was a great bit of kit which, if dropped down a mountain, we wouldn’t be too upset about and it was much easier to understand and cheaper to run as we didn't have to worry about memory cards and when to change them or the type of compression that was being used.
We also wanted to shoot in 16x9 and as cheap DV cameras don’t shoot in real 16x9 (they do a thing call letter box) we had to buy a 16x9 lens adaptor, another £95.
Power is another issue so in order to make sure that the battery didn’t run out half way the route an additional long life battery was purchased in addition to the supplied battery.
So for round about £300 we were ready to go
1 x JVC DV Camera
1 x 16x9 wide angle adaptor
1 x High capacity battery
3 x Mini DV tapes
In retrospect we really should have looked at using a separate microphone as a lot of the shots we had we couldn’t use as the audio was ruined by the high winds which made it impossible to hear. A simple little Omni directional mic with a wind shield would have saved us hours in the edit! One to remember for the future. Never over look sound and how important it is!
Editing Equipment
This is where most of your time will disappear, in the editing process!
First things first you will need is a computer – Mac or PC and then the next thing to do is find appropriate software to edit the video with. There’s lots of software out there to do this, Windows normally comes with Windows Movie Maker as standard and most Macs come with iMovie, both of which are capable of creating a short documentry for your entertainment. We were however, very fortunate to have access to a system running Avid Xpress Pro software in which we able to do just about everything we needed to do. We were also lucky to have a friend who could also drive the software and edit to the documentry for us!
The Editing Process
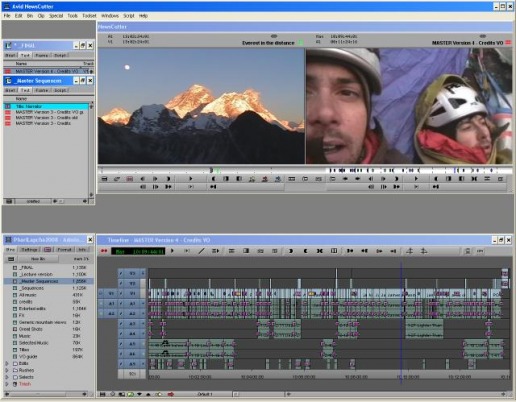
The Avid editing interface
Organising footage
First thing you have to do is copy the footage from your camera to your computer. In our case this meant that we connected the camera to the computer via a Firewire cable and then through the Avid software recorded it onto the computers internal hard drive.
Once the ‘rushes’ were into the Avid system they could then be reviewed and shots selected that we wanted to use in the edit.
Basic edit
Once we had the shots we wanted to use we then started to build up a simple edit which places the shots into the rough order we wanted them to appear. So, shots of Andy and James arriving in Kathmandu were then followed by shots of the flight into Lukla etc. This is much more time consuming than you think, especially when working in the evenings and weekends!
Music
Once we had the basic bones of the edit established, we then started to look for music to place under the picture edit to add to the feel of the evolving story. In our case we had access to royalty free music and so didn’t have to worry if the video was seen in public.
This is also a lengthy process and finding the right music means you spend lots of time listening to music that you think you've heard 10 times before already!!
Fine tuning the edit
Once we'd layed in the music, we found that some of the edits we'd done earlier now didn’t appear to work, or the shots are too long or in most cases, not long enough. It’s now that you go back and tweak the edit further still. This is also quite a long process and at times was quite dull.
Audio Levels
Now we were starting to become happier with the edit, it was then a good idea to make sure that the audio mixing levels are not too far away from each other. In other words, you need to make sure that the music and atmos tracks are not varying in loudness from each other. Yet another time consuming process and also not as easy as you would first think! We really should have spent more time on this aspect of the video in hind sight.
Voice Over
It was decided to give a running commentary on the expedition, outlining the teams objectives, and some insights into the events that took place. This way, it also made the video stand on its own without the need for Andy or James to explain what was going on.
We did this with the aid of a cheap microphone purchased from Maplins (£5) and plugged into the PC this enabled us to capture our voice over artist (our editor in this case) and then place the audio into the edit at the appropriate locations. However if you really want to make a proper job of it then make sure you get the best mic you can and someone with a good voice.
Graphics and odds and sods
Once we had the main edit completed we then inserted some stills, as well as putting titles in the appropriate places. The biggest part of this time went in c'olour correcting' quite a few shots so that the snow didn’t look so blue and removing dust and dirt from some of the images.
Once finished the edit was exported from the Avid and made into DVDs as well as an MP4 that we have used for the YouTube Video.
Video DetailsTitle : British Phari Lapcha Expedition 2008
Duration : 14mins Video Standard : DV25 Format : PAL 16x9 Camera : Andrew Turner and James Thacker Directors : Andrew Turner and James Thacker Editor : Andrew Wild The you tube video shown here to your right has been shortend down to a youtube freindly 10mins. |
|
